


Marketing automation
Klaviyo
Add postcards and letters to Klaviyo flows — one webhook, no Zapier required.
What it does
How Klaviyo works with Intelliprint.
Klaviyo is excellent for email. It is not a strategy for the customers who never open email. Connecting Klaviyo to Intelliprint lets you add a postcard or letter step to any Klaviyo flow — welcome series, abandoned cart, win-back, post-purchase — so the contacts who've gone cold still get reached through the one channel they can't filter out.
One route handles everything. In your Klaviyo Flow Builder, add a Webhook step that calls the Intelliprint API directly — no separate app to install, no per-automation cost. It supports letters, postcards, and direct mail from the same flow.
Mail lands three to five working days later. Intelliprint creates each piece as a draft by default, so you can preview before switching a flow to live.
Common use cases
What teams build with Klaviyo + Intelliprint.
- Send a postcard to profiles that haven't opened email in 30 days (via webhook)
- Trigger a letter when a customer reaches VIP status (via webhook)
- Post a welcome pack after first purchase (via webhook)
- Send a reactivation postcard to lapsed high-LTV customers (via webhook)
- Mail a physical thank-you after a review submission (via webhook)
Set-up
Get connected in 4 steps.
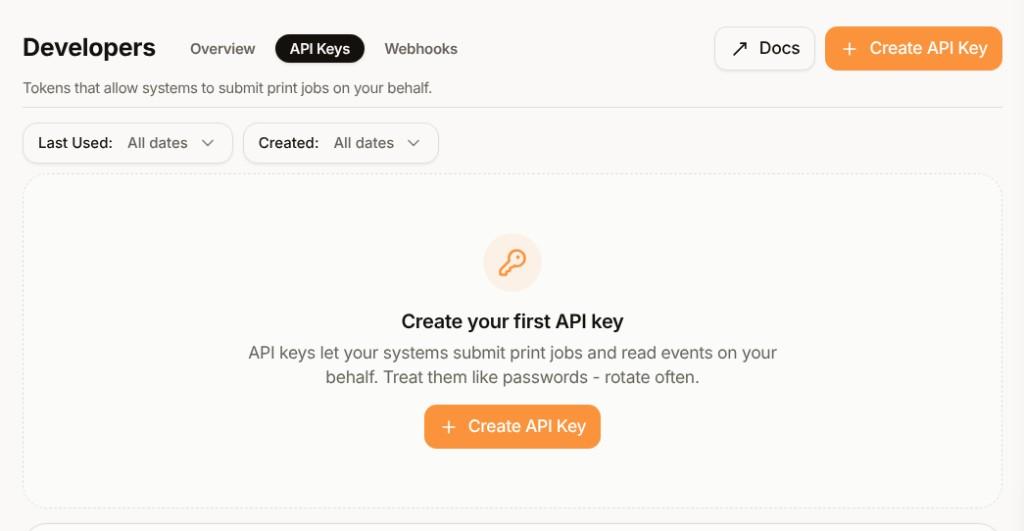
Get an Intelliprint API key
Create a key in the Developers → API Keys section of your Intelliprint dashboard. Keys are shown once when created — store it securely.
Add a webhook step to your Klaviyo flow
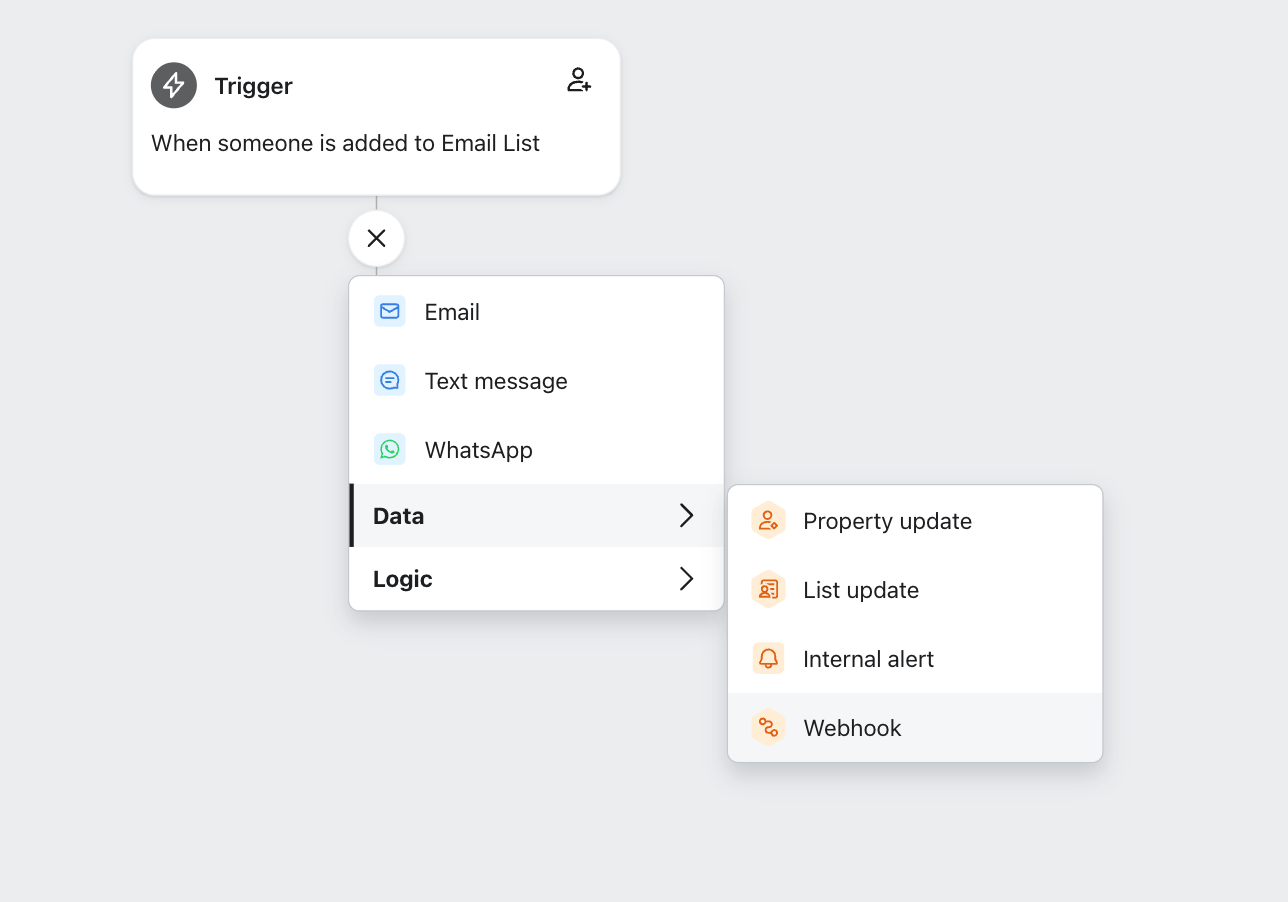
In Flow Builder, click the + icon to add a step, then choose Webhook from the Data sub-menu.
In your Klaviyo Flow Builder, click the + icon to add a step, then choose Webhook from the Data sub-menu:
Configure the webhook
Set the destination URL, an Authorization header with your API key, and the JSON body.
Set the destination URL to https://api.intelliprint.net/v1/prints, add an Authorization header with your Intelliprint API key, and build the JSON body from your profile properties:
Example JSON bodyJSON{ "testmode": false, "confirmed": true, "template": "YOUR_TEMPLATE_ID", "recipients": [ { "address": { "name": "John Doe", "line": "123 Main Street, Anytown, Anyplace", "postcode": "AB1 2CD", "country": "GB" }, "variables": { "salutation": "Mr." } } ] }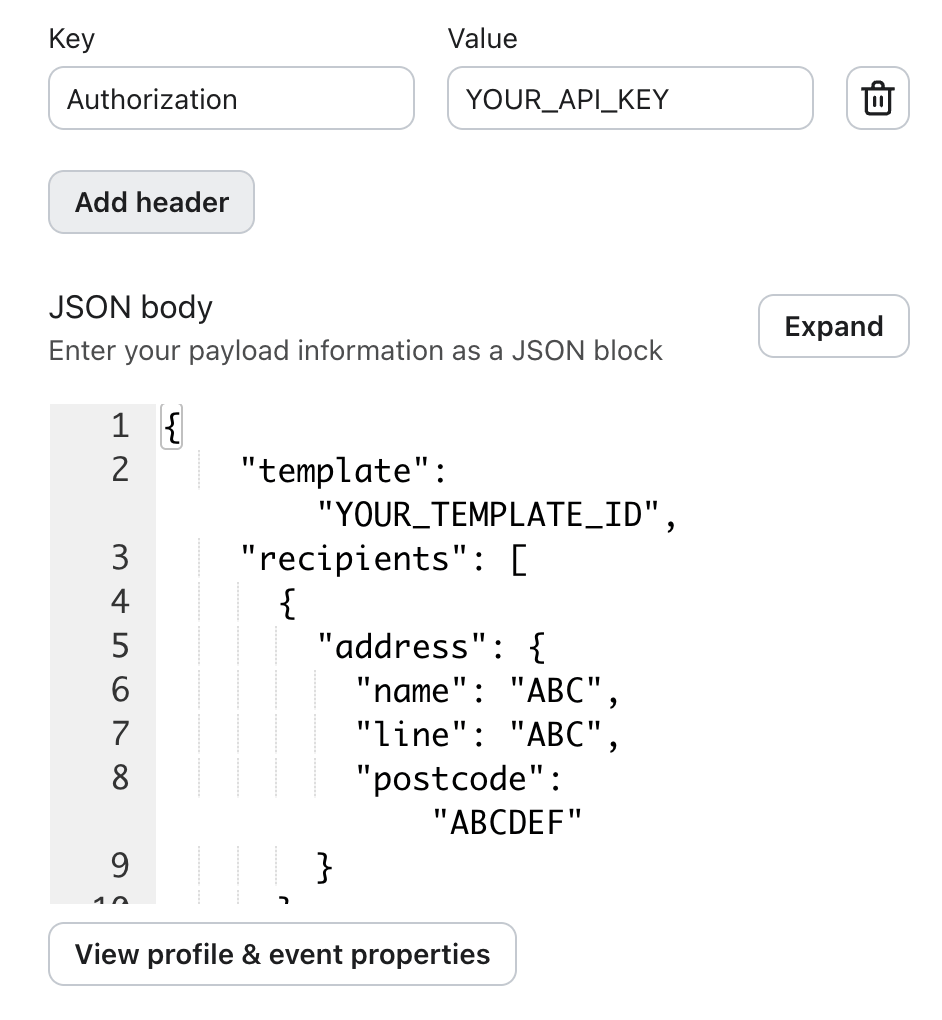
Test, then go live
Test with a single profile before enabling for the full segment. Intelliprint creates the piece as a draft by default; preview in the dashboard, then switch to auto-send.
Ready to send mail from Klaviyo?
Free to start. No setup fees, no minimum order.