
Mailing & production
Import a mailing list and design a letter
Create a mailing list from a CSV, map the address columns yourself, then write a letter with merge fields and preview each recipient before you submit.
Last reviewed · By Intelliprint Team
Mailing lists hold recipient addresses and custom values you can reuse for personalised letters and postcards. Prepare a CSV with column headings and one recipient per row.
Create the list and choose the CSV
- Open Mail, then Mailing Lists, and select New mailing list.
- Enter a clear name and select Create Mailing List.
- Select Import CSV, then Choose File.
- Choose your CSV and select Next. Need a starting format? Use Download example CSV.
Map the columns
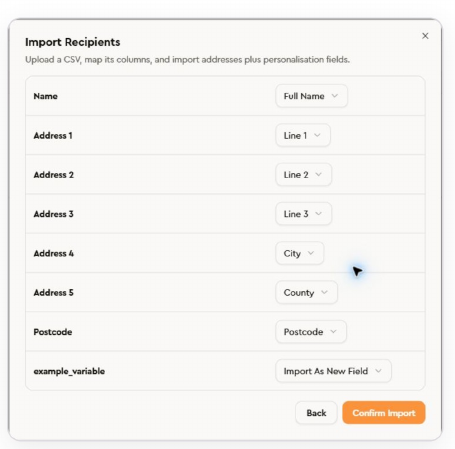
Match your CSV columns to Name, Address 1 to 5 and Postcode. Check every match yourself rather than relying on the automatic mapping.
Choose Import As New Field for any extra values you want to use in the designer.
When the mappings are right, select Confirm Import. Then check the imported count and data before you start a print.
Check the imported data
Check the names, address lines, postcodes and custom values. Click a cell to correct it. It saves when you click away. Use Add Recipient for another row and Add Field for another custom column. Look out for accidental duplicate recipients.
Choose a mailing type and design
Select Send to print on the list. Choose Letters for an A4 letter or Postcards for a postcard. This starts a print using the list, but you still review the job before it is sent.
For letters, select New Letter to write a new design, or choose a saved template.
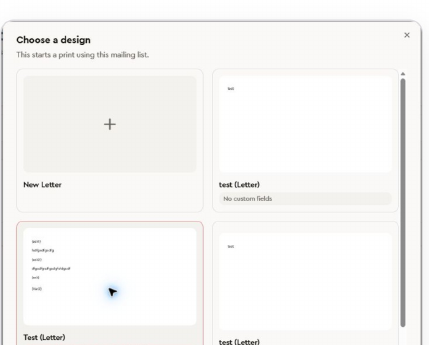
If the designer says Missing, followed by a count of fields and their token names, the template needs columns your list does not have. Add and fill in those fields, or choose a template that matches your list.
Design the letter
Give the letter a clear name, and check the right mailing list and recipient count are connected. Write in the main content area, and use the toolbar for font, size, emphasis, alignment and lists.
Place the cursor where a value should appear, then click a field in the left panel. Recipient Name inserts {address.name}. Address Line inserts {address.line}, Postcode inserts {address.postcode}, and Current Date inserts {date}. Your custom columns appear under List fields.
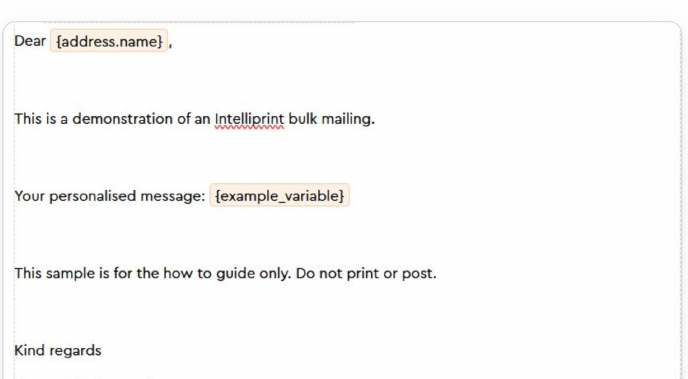
Keep the address area clear. The recipient address is placed in the marked area automatically. Keep everything else out of that box. Use Text box, Image, Table or QR code when your layout needs them.
The fields panel should show your list and Ready for this list. If it says Connect list or Add recipients, connect the right mailing list. Each field must match a filled-in column in that list.
Select Save to keep the letter as a reusable template. After saving or reopening a design, check the recipients are still connected and reconnect the list if needed.
Preview and prepare the draft
Select Preview, then use the arrows to step through each recipient. Check the name, address, custom values and layout, including any unusually long values.
Select Exit preview to make changes. When the design and recipients are right, select Send to print in the designer. This opens a print draft for review. It does not submit the job.
In the draft, select recipients in the left panel or use Previous letter and Next letter. Check the settings for the whole mailing, the letter count and the total including VAT.
Before you submit, run through the final checks in upload, check and submit. Leave the draft unsent if you are still reviewing it.